The process begins with board selection. The two main
components of a landing net are the hoop, and handle. When selecting a board
for the hoop a couple things you need to consider is what type of wood you want
to use. I really like working with Red Oak because of its strength, but any
other hardwood is a good choice. You will be ripping the board into laminations
so the board should be free of knots. Strait grain boards make the best
lamination. A quick look at the end grain of a board will tell you whether or
not the board has been slabsawn or quatersawn. Quartersawn boards is what you want to make your laminations out of.

.JPG)
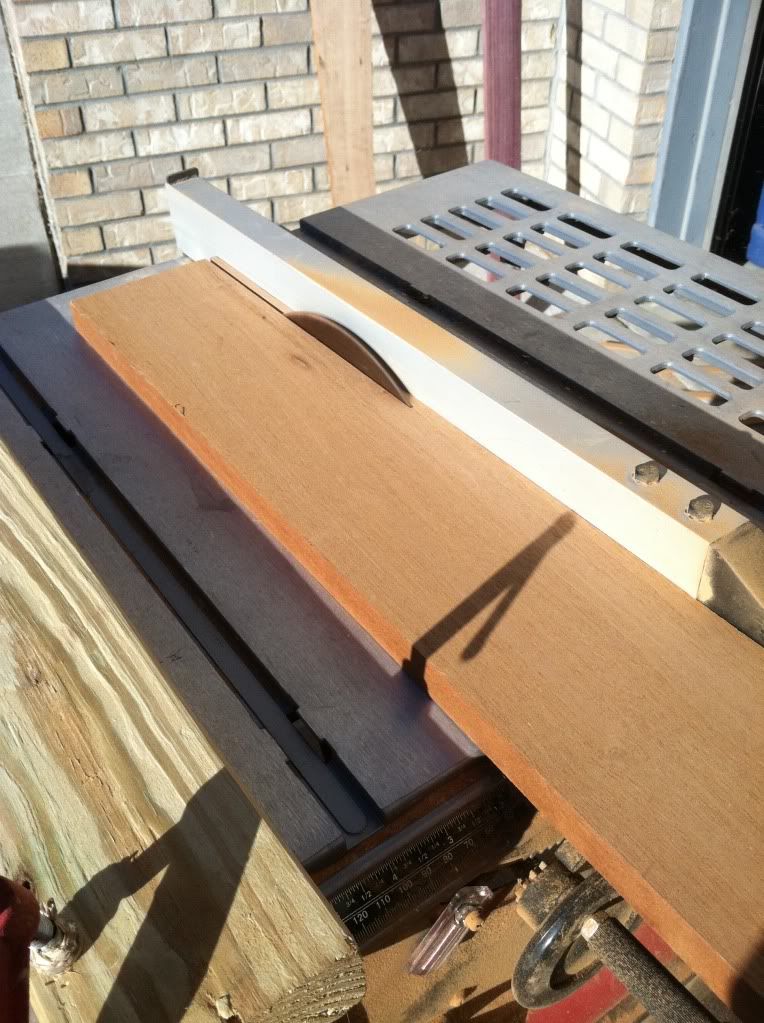
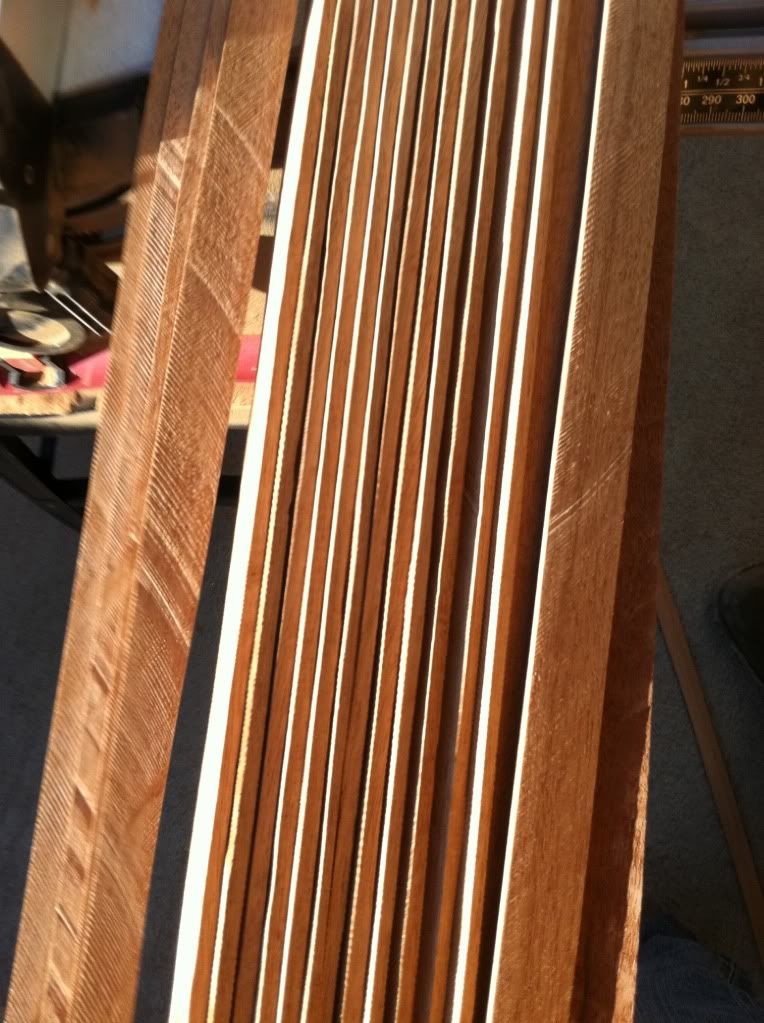
Once your boards are selected you can began ripping down
your laminations. Most net manufacturers use 3 to 6 laminations in their hoops.
I usually determine how many laminations I’m using based on the size of the net
I’m making, and the type of wood I’m using. Softer woods need more lamination
to make a strong hoop. I cut the laminations on table saw using a 200 tooth
blade to get the cleanest cuts. The thickness of the laminations depends on the
number of laminations being used on the hoop. For a 5 lamination hoop I tend to
use laminations that are .090 or 3/32’’ thick. There really is no rule for
thickness. Once the laminations are cut then they need to be planed or sanded
to the make the surface even. A quick run over a stationary belt sander usually
does the job.
The rough cut is easily planed with a stationary sander
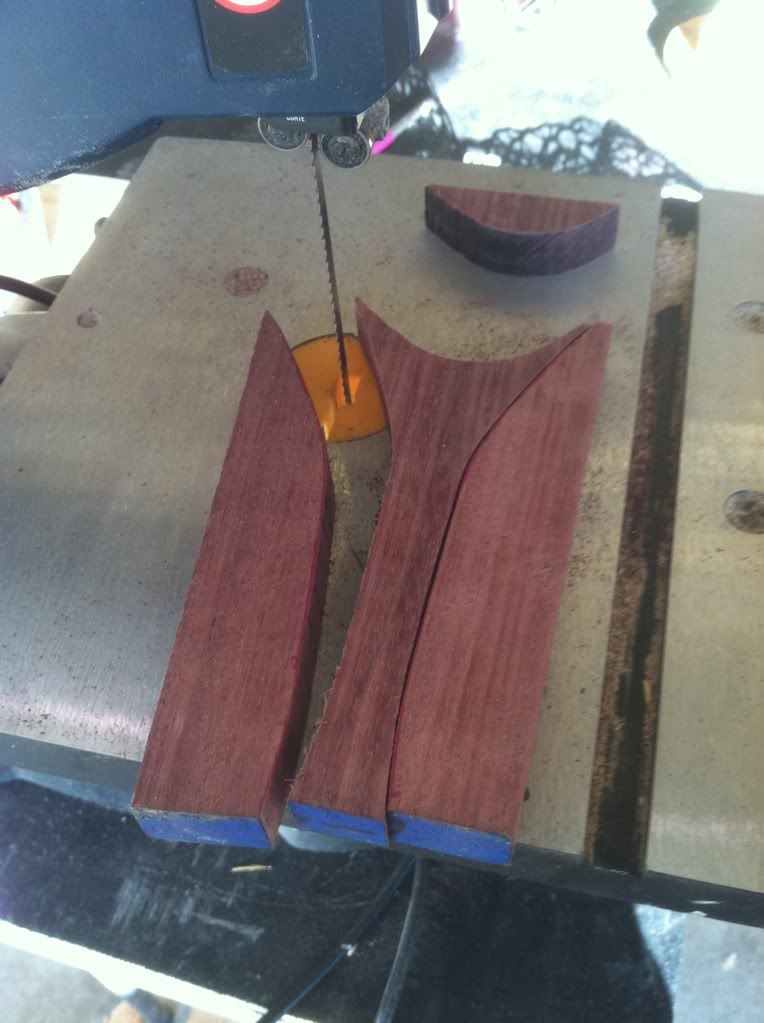
The next step is to make your handle. Many times I cut out a
template out of a piece of cardstock. I fold the cardstock in half and draw out
half the handle so when I cut it out and unfold the cardstock the handle is
symmetrical. A quick trace onto the piece of wood you using, and your piece of
wood is ready for the band saw.
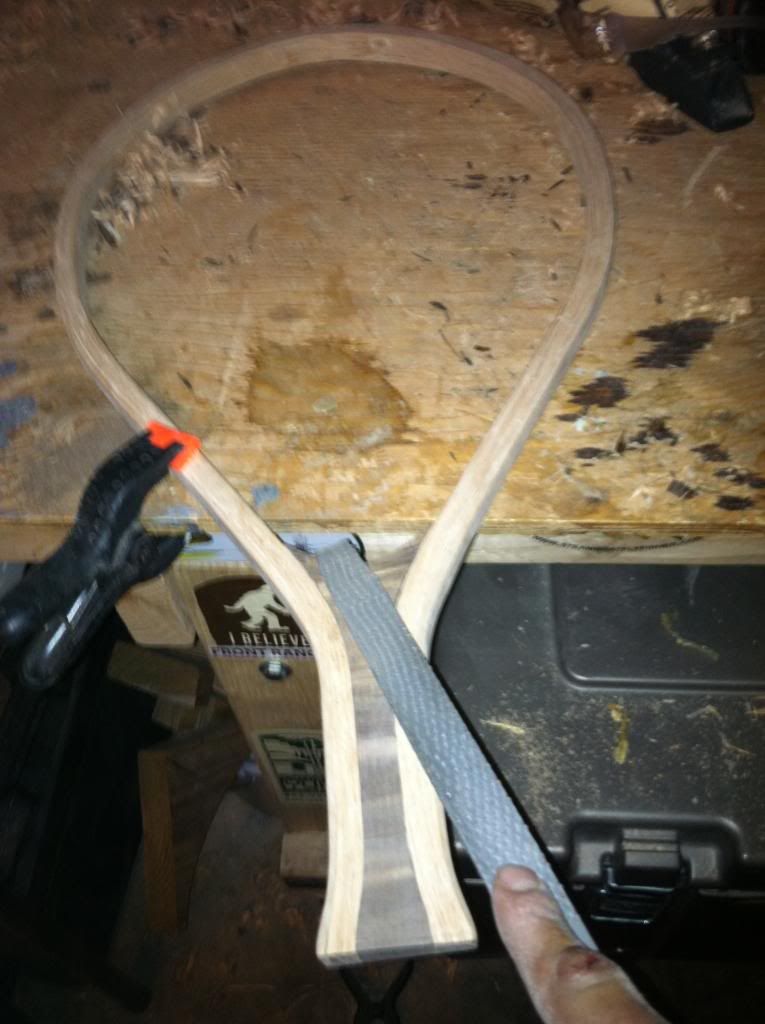
Now that your laminations & handle are cut you are ready
to glue your laminations together, bend your hoop, and glue your hoop to the
handle. To avoid breaking laminations during the bending process I let the
laminations soak in water overnight. Most of the
laminations are longer then my bathtub, so I purchased a vinyl gutter from the
hardware store. This allows me to soak up to 10’ laminations. A jig is an
important tool necessary to bend a perfect hoop. The jig will determine the
shape of the hoop. The lamination are first glued together with gorilla glue,
and then clamped around the jig with a series of spring loaded clamps, and
c-clamps. Gorilla glue expands and will sometimes seep out between the
laminations. That is not a problem, and
can be chiseled off after the glue dries. I let the hoop dry for 24hrs before
taking it off the jig.
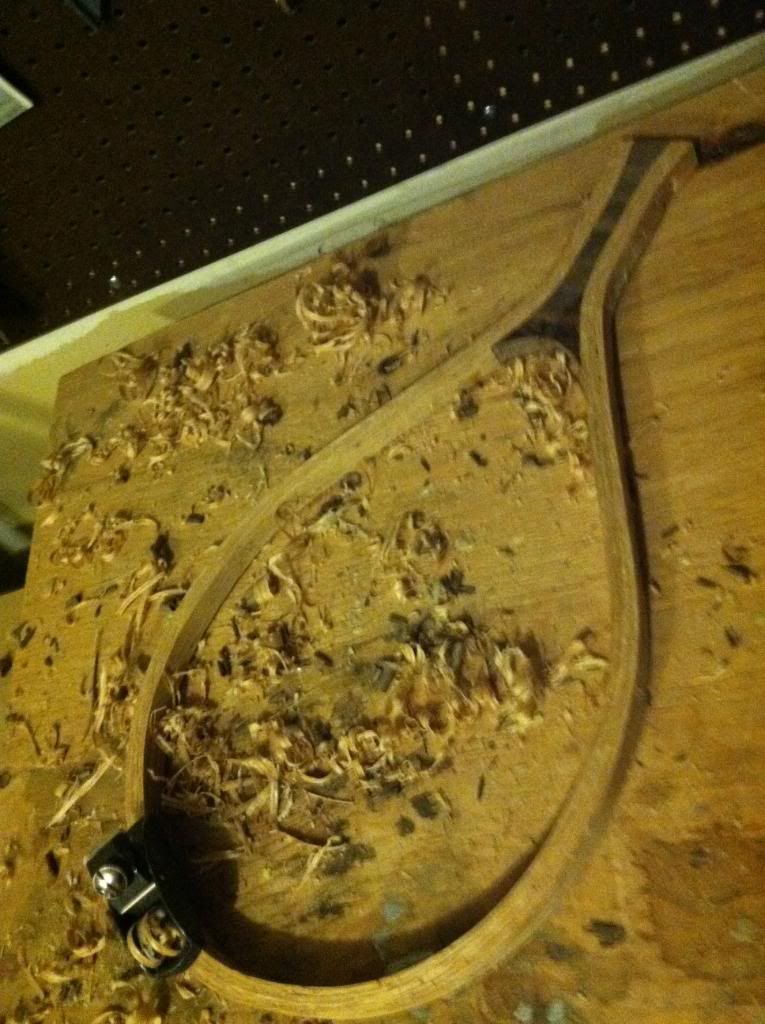
Different styles of jigs.
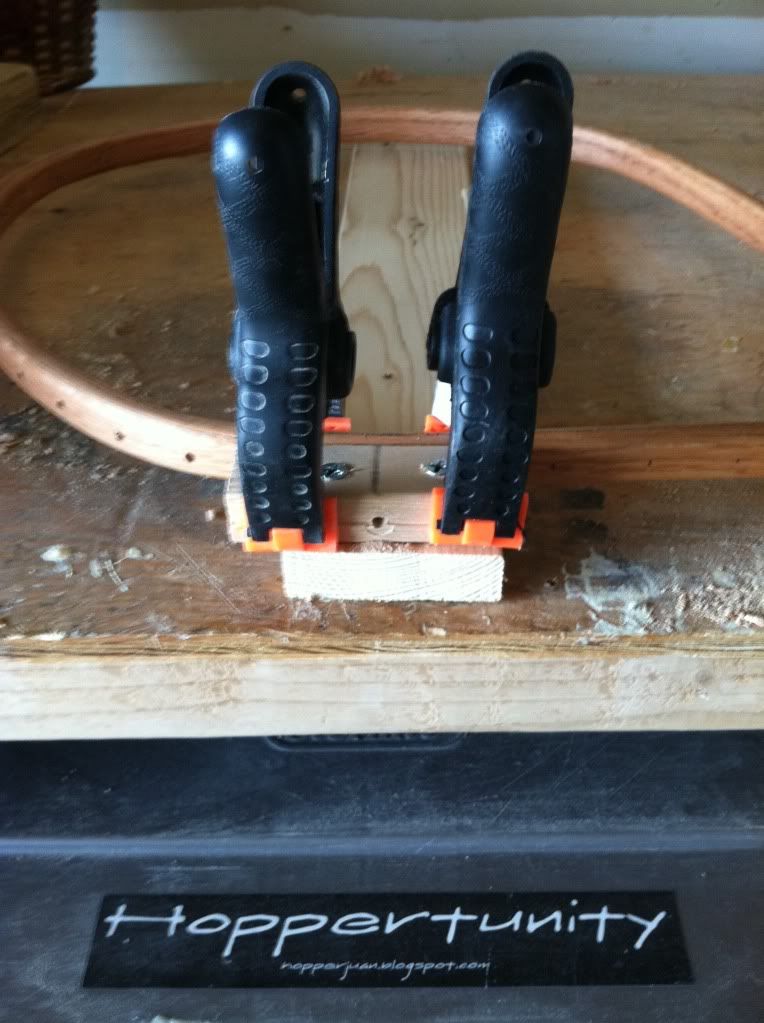
Clamping

The two boards you started with are now looking like a
landing net. A small hand plane is now used to even out the surface of the net.
The next step is shaping. I use a series of hand tools and sand paper for this
process. The final step is sand with 320 grit sand paper to prepare the net for
staining.
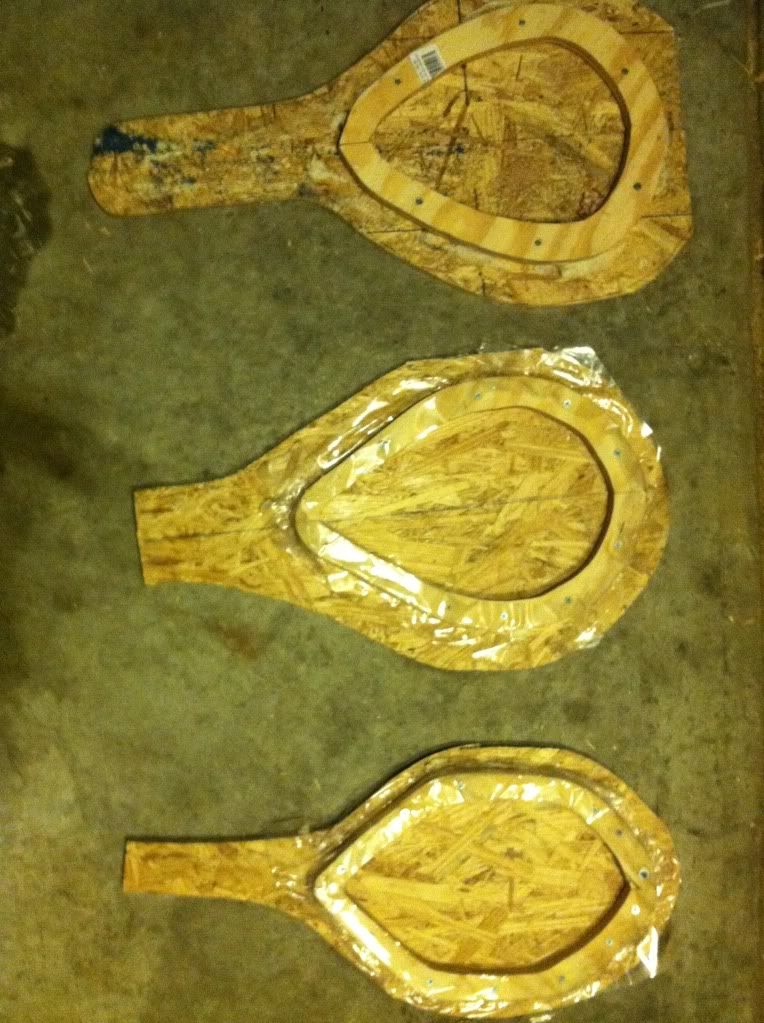
To attach the net bag to the hoop holes must be drilled in
the hoop to allow you to “sew” on the net bag. I made a simple jig for doing
this, and the number of holes & spacing will be determined by the net bag
you are attaching.
Your piece is now ready for staining. I like using natural
stains that enhance the beauty of the natural wood without modifying the color.
Once your stain is dry apply several coats of marine grade varnish, and buff to
polish. The last step is to sew the bag on. Many different chords can be used
from wax cotton to poly chord.
.JPG)
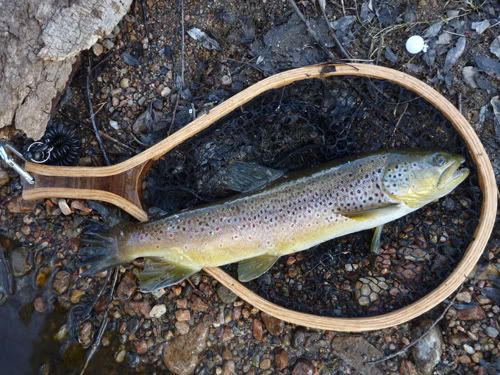
Once the bag is on the hoop get on the water and put a fish
in the net!